
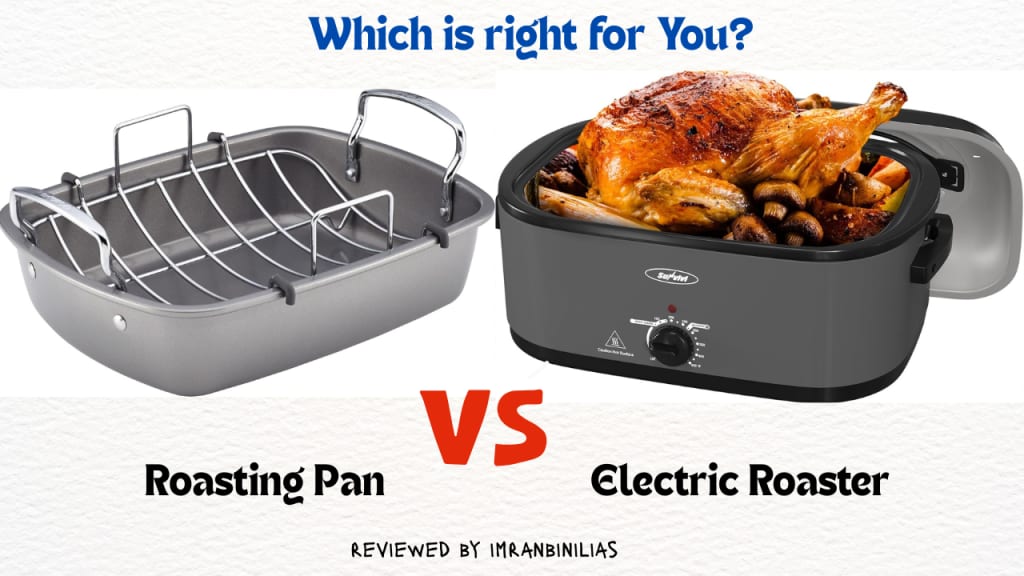
Roasting Pan vs Electric Roaster: Which is Right For You?
Which one is best for you depends on how you like to cook, how much space you have, and what you need it for.

Before we compare roasting pans and electric roasters, here’s what I found after testing them. If you want the best browning and a pan that can do many things and last a long time, a good stainless steel roasting pan is the way to go. But, electric roasters are easier to use, cook faster (about 30% faster than regular ovens), and save energy.
✅ Check the latest deals: Copy link and Paste browser and enjoy....
👉 Roasting Pan = https://amzn.to/43g8MQh
👉 Electric Roaster = https://amzn.to/3GQDIir
Key Takeaways
- Browning: Roasting pans excel at achieving deep browning and caramelization due to direct oven heat.
- Versatility: Roasting pans are more versatile for various cooking methods beyond just roasting.
- Durability: High-quality roasting pans, especially stainless steel, offer exceptional longevity.
- Convenience: Electric roasters offer greater convenience with built-in temperature control and self-basting features.
- Speed: Electric roasters cook significantly faster (around 30%) than conventional ovens.
- Energy Efficiency: Electric roasters can be more energy-efficient for roasting smaller to medium-sized items.
- Space: Electric roasters can free up oven space, especially useful during holidays.
- Choice Depends: The best choice depends on individual cooking style, space constraints, and specific roasting needs.
Overview
Roasting Pans:
What They Are: Strong, usually oval or rectangular pans with high sides. Great for cooking big pieces of meat or whole chickens in the oven.
How They’re Made: Usually from strong metals like stainless steel or cast iron. Good ones are heavy so they don’t bend in high heat.
Key Features:
Removable Rack: Lifts the meat so hot air can flow around it, and drippings go to the bottom.
Strong Handles: Make it safe to take heavy pans in and out of the oven.
High Sides: Stop grease from splattering.
Good Ones: Like the Viking Culinary roaster, have layers of metal (like aluminum in the middle of stainless steel) to spread heat well.
What They’re Good For: Not just roasting! You can also use them for slow cooking (braising), baking bread with a crispy crust, and making big casseroles or roasted vegetables.
Cost: Can be anywhere from around $70 for a basic stainless steel one to over $300 for fancy brands like Le Creuset. The price depends on what they’re made of and any extra features.
Electric Roasters:
What They Are: Countertop appliances that work like a mini oven. They have their own heating element, a removable pan inside, and a lid that fits tight.
How They Work: They make their own heat with electric coils around the inside. This creates a hot, moving air environment that cooks food evenly.
Key Features:
- Come in different sizes, usually holding 18–26 quarts.
- Better models have digital controls, timers, and even thermometers to check the meat’s temperature.
- Some, like the RoyalCraft with a glass lid, let you see the food without opening it.
- Use about 400–450 watts, which is less energy than a full-size oven.
How They Cook: They trap heat and moisture inside really well. This means food cooks faster (about 30% faster than in a regular oven) and often comes out juicier, especially big pieces of meat. However, because it’s a sealed environment, you might need to do extra things if you want the outside to be really crispy.
My Experience
Over the past ten years, I’ve cooked a lot using both roasting pans and electric roasters. My first good roasting pan, a stainless steel one with a rack, became my go-to for Sunday dinners. It always made beautiful, brown roasts, and the drippings were perfect for making gravy. It wasn’t hard to learn how to use, but I did learn that you need to preheat it well and know if your oven has hot spots. I also found that it was great for more than just roasting — I used it for roasting vegetables and baking crusty bread.
About five years ago, when I had Thanksgiving in my small apartment with only one oven, I tried an electric roaster. It was a game-changer! It cooked a big turkey perfectly and kept it juicy, while my oven was free for all the side dishes and desserts. I was also surprised at how little electricity it used. However, the turkey skin wasn’t as crispy as when I roasted it in the oven. So, I started a trick where I’d finish the turkey in the oven for the last 20 minutes to get that nice golden skin.
From all my cooking, I’ve learned that both have their own advantages. A roasting pan gives you better control over how brown and flavorful the outside of your food gets. It’s great for when you really want a good crust and deep flavors. An electric roaster is super easy to use, keeps a steady temperature, and keeps food moist. I’ve been able to cook most of the same recipes in both, but I often need to change the cooking time and how much liquid I use. Lately, I’ve tried some of the newer electric roasters from 2025, and they have better heating, which makes the food brown more like it does in a roasting pan. This means the difference between the two is getting smaller.
How to Use
How to Use a Roasting Pan:
To use a roasting pan well, start by picking the right size. The food should fit with some space around it so the hot air can move freely. For meat, put a rack inside the pan to lift the meat up. This lets the heat get all around it and the juices drip to the bottom. It’s a good idea to heat the empty pan in the oven for 5–10 minutes before you put the food in. This helps the food sear right away and keeps it from sticking. If you have a roasting pan that can go on the stovetop, you can brown the meat there first for even better flavor before you put it in the oven.
How you cook depends on what you’re making. For a roast, season it well. If it’s a chicken or a roast, you might want to tie it up so it cooks evenly. Put the pan in the middle of the oven. If your oven cooks unevenly, turn the pan halfway through. For a 3–4 pound beef roast, cook it at 375°F for about 45–60 minutes until the inside temperature is 135°F for medium-rare. Spooning the juices over the meat now and then adds flavor and keeps it moist, but don’t open the oven too much or it will take longer to cook. Roasting pans like the STONELINE ones hold heat really well, so the temperature stays steady even when you open the oven.
How to Use an Electric Roaster:
To use an electric roaster the right way, put it on a stable surface that can handle heat. Make sure there’s some space (about a foot) around it so it doesn’t damage the walls or cabinets. Before you use it for the first time, wash the inside pan and rack with soapy water. Unlike regular roasting pans, you need to preheat an electric roaster for about 15–20 minutes to get it to the right temperature. Most new models have digital controls that make it easy to set the temperature, usually between 150°F and 450°F.
How you set the timer and temperature depends on the model. For a turkey in a big (26-quart) electric roaster, set the temperature to 325°F after it’s preheated. It usually takes about 15 minutes per pound for a turkey that isn’t stuffed — much faster than in a regular oven. Because an electric roaster is sealed, it keeps the moisture in, so you usually don’t need to add extra liquid. But if you want it extra moist, you can add about half a cup of water or broth to the bottom. The most important thing is not to open the lid too often, because every time you do, it can add another 15–20 minutes to the cooking time because the heat escapes.
Value for Money
The cost of choosing between a roasting pan and an electric roaster isn’t just about how much you pay at the store. Good roasting pans can cost more upfront, from around $70 to over $300 for really high-quality ones. However, they are usually very strong and can last for many years, even decades. Electric roasters are generally cheaper to buy, usually between $80 and $200, depending on the features.
When you cook, electric roasters can save you money on electricity. They use about 500 to 1500 watts. In 2025, with electricity costing about 10 to 25 cents per kWh, it might only cost you a few cents to roast a pound of meat in an electric roaster. Regular ovens, which you use with roasting pans, use much more electricity, maybe 2000 to 5000 watts. This could make cooking the same amount of food much more expensive. If you often cook big roasts or have holiday dinners, the savings from an electric roaster can add up.
Recommendations Based on Needs
For New Cooks: If you’re just starting to cook more seriously, a regular stainless steel roasting pan with a rack (around $70) is a great first choice. It’s easy to use for roasting but can also be used for other recipes. If you have a small kitchen or feel unsure about using a regular oven for roasting, an electric roaster that you just set and let cook could be easier and give consistent results.
For Big Families and People Who Often Have Guests: If you often cook for six or more people, a large roasting pan (like the Hestan 16.5" Roaster) can handle big pieces of meat and still be used for smaller dishes. However, an electric roaster is really useful here because it frees up your regular oven when you’re cooking big holiday meals. A large electric roaster (like the RoyalCraft 26QT) can cook a big turkey and uses less energy than your oven.
For Serious Cooks Who Want the Best Results: If you really care about getting perfectly browned food and making great sauces, a traditional roasting pan is a must-have. High-quality pans like the Viking or Le Creuset ones spread heat perfectly. If you’re on a budget, you might want to get a good basic roasting pan for most of your cooking and then also get a cheaper electric roaster just for cooking big things during holidays. This way, you get the best of both without spending too much money at once.
Troubleshooting Guide
Roasting Pan Problems and How to Fix Them:
Uneven Browning: This is usually because your oven heats unevenly, not the pan. Use an oven thermometer to check the temperature and turn the pan halfway through cooking. You can also try putting a pizza stone on the shelf below to help keep the temperature steady. If you have an electric oven, don’t use the fan setting with some pans, as it can cause cool spots.
Food Sticks and It’s Hard to Clean: Make sure meat is dry before you roast it. You can also lightly oil the rack (but not the bottom of the pan). For stuck-on food, let the cooled pan soak in hot water with a spoonful of baking soda for 30 minutes, then gently scrub it with a non-metal pad. Even if a good non-stick pan like the All-Clad says it’s dishwasher safe, washing it by hand will help it last longer.
Keeping Your Pan in Good Shape: Store pans with something between them so they don’t get scratched. Don’t use metal tools on them. For stainless steel pans, you can use a special cleaner to remove marks from high heat. For cast iron or enamel pans, rub a little bit of cooking oil on them after you clean and dry them, then heat them in a 350°F oven for an hour and let them cool. This helps them work better and keeps them from rusting or staining.
Electric Roaster Problems and How to Fix Them:
Temperature Isn’t Steady: First, make sure the lid fits tightly. Even a small gap can let a lot of heat out. Check the heating parts for any food or buildup. Some people find that putting aluminum foil loosely over the food (but not touching the heaters) helps keep the temperature even by bouncing heat back down. If it’s still not right, your owner’s manual for 2025 models might have instructions on how to calibrate the temperature using some button presses.
Food Doesn’t Brown Well: Electric roasters keep moisture in, which isn’t great for browning. Try brushing meat with butter and paprika before cooking to help with color. For chicken or turkey, you can take the skin off, season the meat, then put the skin back on before roasting to keep it moist. You can also try putting the meat under the broiler for a few minutes after it’s cooked in the roaster to brown it, but watch it closely so it doesn’t overcook.
Electrical Problems: If it won’t turn on, check if it’s plugged into a working outlet and if you’ve tripped a circuit breaker because it uses a lot of power. Look at the power cord for any damage, especially where it connects to the unit. If it heats sometimes but not others, the problem is likely with the thermostat or the control board. You can sometimes replace these parts yourself if they’re available, but for serious electrical issues, it’s usually safer to get it fixed by a professional or just replace the roaster, especially since they’re not as expensive as high-end roasting pans.
Tips and Tricks
Roasting Pan Super Tips:
Flavor-Packed Chicken: For really tasty chicken, gently loosen the skin and rub herb butter directly onto the meat before you roast it.
Perfect Veggies: When roasting vegetables with meat, add them at different times. Harder veggies like potatoes can go in at the start, while softer ones should be added halfway through.
Restaurant-Style Sauce: After roasting meat, pour some wine or broth into the pan and scrape up all the browned bits from the bottom. Then, let it simmer until it thickens into a delicious sauce.
The “Reverse Sear” Secret (New for 2025): Try cooking your meat at a low temperature (225°F) in the roasting pan until it’s almost done. Then, let it rest for a bit and finish it off with a quick, high-heat sear (475°F) to get a perfect crust while keeping the inside just right.
Electric Roaster Pro Tips:
Make it Smell Amazing: Before you preheat the roaster, put some herbs, lemon or orange slices, and flavorful vegetables under the rack. As it heats up, they’ll create a fragrant steam that makes your food taste even better.
Crispy Chicken Skin: For crispy skin, make sure the chicken is really dry, brush it with oil, and then turn the roaster up to its highest temperature for the last 15 minutes of cooking.
Keep Food Warm Easily: If you’re having a party, use the “keep warm” setting (usually around 150°F-170°F) to hold your food at the perfect temperature for up to two hours without it drying out. This is great for buffets.
Cook Multiple Things at Once: Use aluminum foil to make dividers inside the roaster. This lets you cook different foods that need different seasonings or cooking times at the same time.
The Power of Using Both:
Sometimes, the best results come from using both a roasting pan and an electric roaster together:
Brown First, Then Roast: Start a big roast in a roasting pan to get a nice brown outside, then move it to a preheated electric roaster to finish cooking and stay juicy.
Holiday Meal Champs: Use the electric roaster for things that need to stay moist, like turkey, and use your roasting pans in the regular oven for things that need to get brown and crispy, like stuffing or scalloped potatoes.
Perfect Temperature Control: Use the electric roaster to cook your food at a steady temperature, and then finish it in the roasting pan under the broiler for that perfect crispy top.
Final Verdict
Choosing between a roasting pan and an electric roaster boils down to your cooking priorities. Roasting pans are champions of browning and offer versatility for various oven tasks, boasting durability for long-term use. However, they occupy oven space and require some skill for even cooking.
Electric roasters prioritize convenience and speed, cooking faster while keeping food moist, especially larger roasts. They’re energy-efficient for smaller meals and free up oven space, a boon during holidays. The trade-off can be less pronounced browning compared to traditional roasting.
For beginners, a roasting pan offers a foundational experience. Large families might favor the capacity and oven-freeing aspect of an electric roaster. Those prioritizing perfect browning will lean towards a roasting pan.
About the Creator
Imran.Bin.Ilias
I am new to Vocal Media. Discuss making money from home. Let's review comparing products to see what's best for you. Feel free to join, and I will join for lovings.
Keep reading
More stories from Imran.Bin.Ilias and writers in Confessions and other communities.
Ninja Cfn601 vs Cfn602: Which Is Best?
The Ninja CFN601 and CFN602 are both good for making coffee and espresso. There are small but important ways they are different. They both use strong pressure to make drinks. You can make a small shot of espresso or a big pot of coffee. The big difference is the CFN602 can also make a ristretto. A ristretto is a very small and strong shot of espresso.
By Imran.Bin.Ilias9 months ago in Confessions
Blessed 33
So I woke up on the morning of February 5, 2026 and guess what and you know what I realized? It’s my 33rd birthday. Do you know what that means? Yes, technically I’m getting old, but what I couldn’t have guessed was this would be one of the best days of my life.
By Joe Pattersonabout 18 hours ago in Confessions
Modern Relationships and the Psychology Behind Situation ships
One of the characteristics of contemporary relationships is the situation ship. They fall in the grey space between casual dating and a serious partnership, and usually lack definitions or expectations. Individuals involved can behave as a couple where they have emotional intimacy and spend time together but never define the relationship. This vagueness indicates the larger shifts in dating culture, in which flexibility is frequently preferred to structure. The initial feeling of comfort in relationships can be due to the fact that it is not pressurizing and it enables them to connect without making a commitment.
By Olivia Smith2 days ago in Confessions


Comments
There are no comments for this story
Be the first to respond and start the conversation.